 |
DI-Guy SDK Documentation
13.2
|
|
DI-Guy SDK Documentation
13.2
|
DI-Guy is designed to simplify the task of adding lifelike human characters to real-time simulations.
The goal is to allow you to work at a high level, concentrating on telling characters where to go and what to do, while the software and content handles the less interesting, but critical low-level details such as:
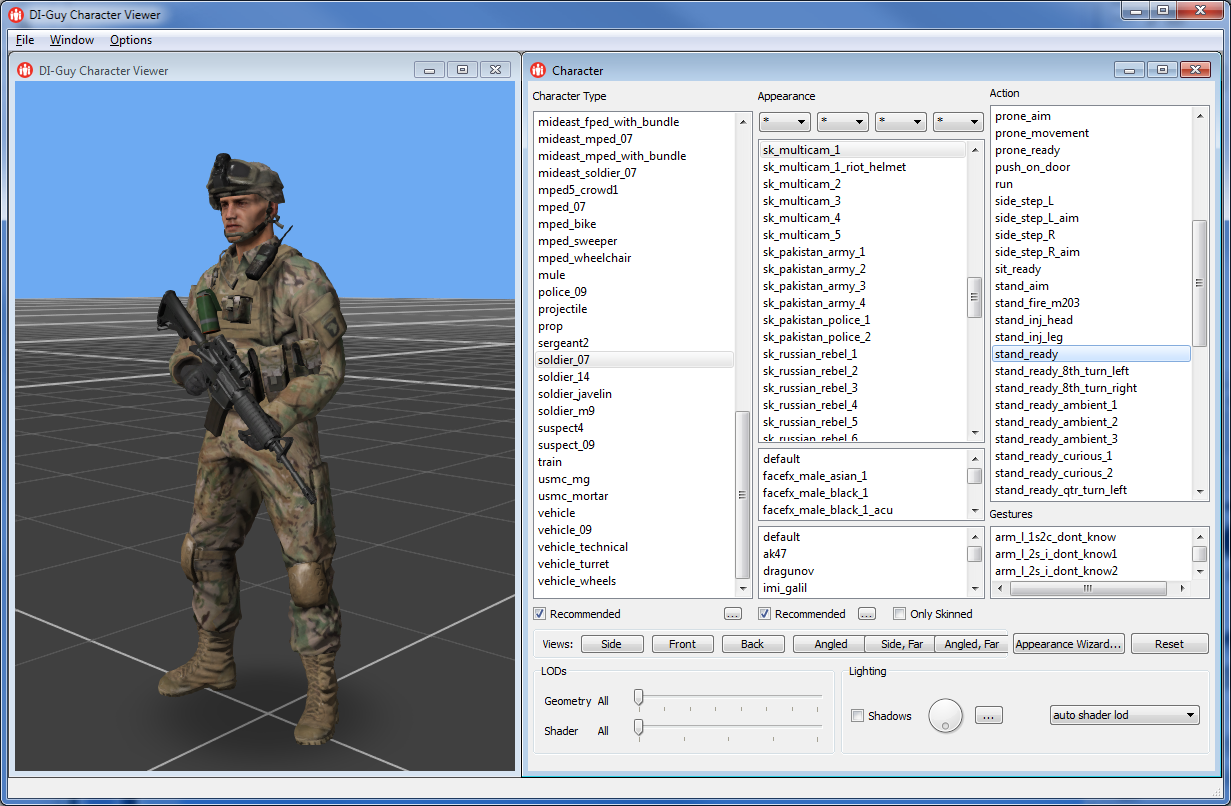
DI-Guy ships with a license-free application called the DI-Guy Character Viewer. It lets you view all the characters and motions shipped with DI-Guy.
To open the Character Viewer, on the Start menu, choose All Programs -> DI-Guy Applications 13 -> DI-Guy Character Viewer.
The following figure illustrates a representative skeletal structure for DI-Guy characters, including names of joints and links.
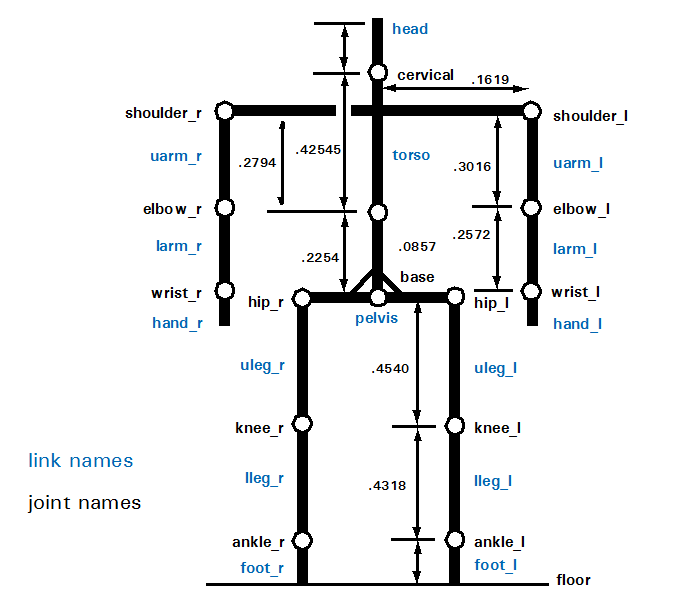
Not all DI-Guy characters share the same skeletal structure, so you should rely on the DI-Guy API query functions to determine topology, joint names, and link names whenever possible.
This section introduces function calls that are common to almost every DI-Guy implementation. Understanding these calls will also help you understand the basic concepts.
Working with DI-Guy starts and ends with the initialization and de-initialization function calls. The initialize call is different for each rendering environment, as follows:
\note If you are using Vega Prime, do not call the initialize/deinitialize calls directly, Vega Prime’s plug-in architecture takes care of them automatically.
The de-initialize call is the same for all renderers – diguy_deinitialize().
In addition to the basic DI-Guy initialization and de-initialization function calls, there are other initialize and de-initialize calls that are sometimes needed, based upon whether or not you are using a particular DI-Guy module. These include:
\note Use of DIS or HLA is determined by the libraries you link against.
Expressive Faces: diguy_facefx_initialize(), diguy_facefx_deinitialize(). OpenAL sound: diguy_sound_openal_initialize(), diguy_sound_openal_deinitialize()
The DI-Guy has functions to:
The C++ class diguyScenario is typically your top-level DI-Guy container class. There is actually a higher class, diguyApp, useful for application-level and multiple scenario control, but it is useful to think of the scenario as the top-level object for almost all your needs. You need to create a scenario when programming with DI-Guy. Use diguy_create_scenario() to do this.
Once the scenario is created, you need to populate it. You can populate a scenario in the following ways:
A call to the update() function advances time, performs any scheduled operations, runs logic, and updates the values for all the articulations of each character. Update is usually called every frame. To perform an update, call diguyScenario::update().
DI-Guy works with both immediate mode and scene graphs. For scene graph renderers, the scene graph automatically calls the rendering functions for the characters. For immediate mode renderers, you must use a DI-Guy function call to perform the rendering. So for immediate mode rendering, be sure to include a call to the function diguyScenario::draw(). Similar to update above, you can also call draw() on your individual characters.
The two most important DI-Guy classes are:
The following classes are also important:
diguyCharacterPath, diguyPathShape, diguyWaypoint The most basic way of controlling a diguyCharacter is to specify its position and action. Both the position and the action can be in one of two modes: path or free. A character in path position and path action mode will have its position and actions governed by a diguyPaths. The shape of the path is determined by its path shape, which in turn is defined by waypoints. Waypoints are 3-D points through which the path shape must pass, as well as information about the angle and acceleration the path shape takes when it goes through the waypoint. A path shape can be owned by a scenario, and thus shared between multiple characters. Action beads on the path direct the characters on what actions to perform. A character in path position and free action mode will follow its path, but the user specifies the actions the character is performing. A character in free position and free action mode is typically given a starting position and then accumulates its position as it travels as you directly specify which action the character is performing. The combination free position/path action mode is not allowed.
\note DI-Guy AI adds a path planner and high level behaviors to improve movement on paths.
The following sections describe best practices for using create functions and using path and action modes.
When using DI-Guy, the method for instantiating new classes is to call create() functions from a higher class. Do not construct and destroy DI-Guy classes using new and delete functions. These constructors are private and cannot be called. Often these classes will automatically get destroyed when the higher class is destroyed. For example, to create a character, you should use the create_character() function call from the diguyScenario class.
DI-Guy behaves differently based on the position mode and action mode in use. The position mode determines how a character’s location is set and the action mode determines how the character knows when to perform actions. Both modes can be set to either free or path. Table 4-1 shows how the two modes interact:
| Path and Action Modes | |
|---|---|
| Mode | Interaction |
| path position + path action | Characters follow a diguyCharacterPath that also commands what actions they perform. |
| path position + free action | Characters follow a diguyPathShape, but have their actions commanded directly by the user through the API. |
| free position + free action | Characters move based on the actions commanded by the user through the API, accumulating position and orientation. |
| free position + path action | Illegal. |
DI-Guy characters can also be controlled using methods described in DI-Guy AI Users Guide. Please consult that manual for information about creating and controlling autonomous characters that use artificial intelligence to determine their behavior and avoid obstacles and other entities.
[Home] [Top of Page] [Working with the diguyScenario and diguyCharacter Classes >>]
 1.8.9.1
